Thursday 21 March 2013

Sashiko embroidery

I'm not normally the embroidery type, and I can't remember now what got me interested in this, but I've been trying out a bit of Japanese sewing lately.  I've borrowed a library book by Susan Briscoe which explains how to do it and what you need - I ordered some navy linen, and some sashiko thread and needles from the shop at the Quilt Museum in York, UK, and off I went!  My first project (there may be more if this turns out well) is a small lined bag, with embroidery on both sides.

To start with you need to mark out a really accurate grid on your fabric. I used a sharp white fabric crayon and a quilting ruler. As I was doing a pattern based on circles, I also cut cardboard templates to mark these out with.  On the first side I used a pattern called Blue Ocean Waves - all the patterns have Japanese names but I can't pronounce them, so I'm sticking with the translations.
P1020164
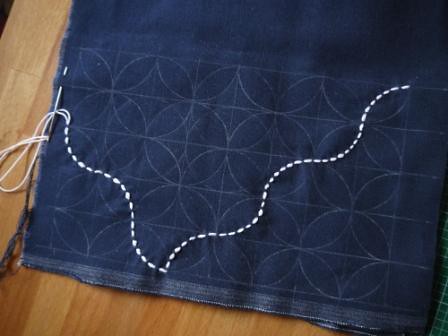
You can see it's a bit wrinkly, even after pressing, but it is the first attempt!  For the other side of the bag I used a pattern called Seven Treasures (and I took more photos this time). Here's the pattern marked out (spot the deliberate mistake) and stitching just begun.

P1020171

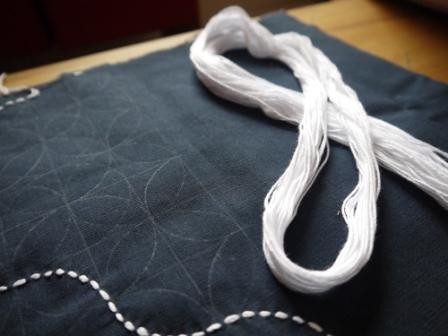
The stitching on this pattern is completed in diagonal lines, which seems to help with getting the circles to look really circular. This time I've managed to keep the fabric a lot flatter, and the stitches more even. The thread is used double (no dropped needles!), which makes the stitches look like little grains of rice on the fabric.  So simple, but really effective.

P1020166


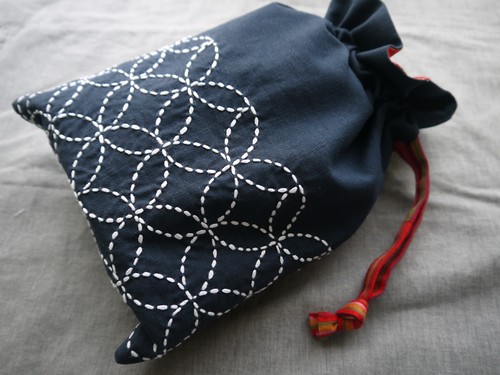
With both pieces of Sashiko complete I gave them a good press and made up into a lined bag with some red striped fabric I've had for ages. It seemed to go really nicely with the linen, as the stripes are woven rather than printed - it reminds me of Indian cotton.

To make the bag, I more or less used Jenny's tutorial (http://www.incolororder.com/), but I didn't box the bottom corners as that would spoil the embroidery in this case. Here's my finished bag!

P1020280

P1020299

P1020295

I'm really happy with how this turned out - not perfect, but looks very nice. And so I've already started my next sashiko project, which is a cushion. Different patterns this time, I'll show you when it's done!

Saturday 9 March 2013

Not orange peel

Well, I had in mind to make a beautiful "orange peel" quilt like AmandaJean at Crazy Mom Quilts - as soon as I saw her pictures I thought this quilt was fabulous. But I thought all the applique would take ages, so started thinking about how I could piece it by machine.  Back in September (?) I got out all my favourite fabrics and sorted them into strong colours (for petals) and soft colours (for backgrounds)...

P1010589

I'd never sewn curved pieces together, but how hard could that be? I drafted some templates and started cutting up lots of lovely fabric! A few goes later and I had templates and a technique that worked, so I set to work making petal blocks - here they are! (apologies the following photos aren't very good quality, blame it on the grey sky we have here today)

<P1020229

P1020231

Then: trouble. I sewed two together; they looked lovely. Another two, ditto. Then I tried putting the two together into a square. It looked good, but now I realise why everybody else who's ever made an orange peel quilt has appliqued the petals, not pieced them.  The seam allowances are the issue, where they all cross in the middle I got the biggest stack of fabric you can imagine. It was difficult to sew and it wasn't going to work.  So don't try it at home! Go for applique, or read on!

What was I going to do? If I couldn't sew these blocks into a quilt top I'd either have to abandon them, go down the applique route, or come up with another plan.
I came up with a plan!  Which was to use the blocks, but in a different layout, so that all those bulky seams were a bit more spread out.  By putting two together as a pair of leaves and stacking these into columns I think I've solved my (self-imposed) problem.  More when I have a bit more put together!

P1020234

Friday 1 March 2013

Introducing Frosterley Bazaar

Hi, this is my first post as FrosterleyBazaar, and my first ever blog! I've got a lot to learn!

I've been sewing as long as I can remember, and I'll try anything that involves making things - stained glass, basket weaving, picture framing, felt making, knitting, crochet, print making, you name it.  Mostly I do sewing, and most of that at the moment is quilts.  On this blog I'm hoping to show you the things I make, and how I do it.

I called the blog Frosterley Bazaar because I live in Frosterley (County Durham, UK), and for some time I've sold things I've made under that label.  Frosterley is a small village on the River Wear (population about 800), and a nearby quarry is the source of the beautiful Frosterley Marble used in Durham Cathedral. Technically this isn't marble, but black limestone containing the fossilized remains of the solitary coral Dibunophyllum bipartitum.   More information here (link will open in a speparate window). Anyway, a little geological digression there - more about sewing in my next post!
Related Posts Plugin for WordPress, Blogger...